Install the WRF Model in WSL2
This section will explain on how to install the Weather Research and Forecasting (WRF) Model inside Windows Subsystem for Linux (WSL) 2. This step-by-step guide was tested using Windows 11 with WSL2 - Debian 12 enabled running on ThinkStation P720.
–
Benny Istanto, Climate Geographer
GOST/DECSC/DECDG, The World Bank
Index
1. Working Directory
When you start the WSL, you will be in the user’s home directory: /home/<username>/. If you are not sure, to jump from any directory back to home from within a WSL command, you can use the command: cd ~
For this tutorial, I am working on these folder /home/bennyistanto/.
In the user’s home directory: Create a new, clean directory called Build_WRF, and another one called TESTS
mkdir Build_WRF
mkdir TESTS
Make sure you update the packages in WSL by execute below:
sudo apt-get update
sudo apt-get install build-essential
sudo apt-get upgrade
2. Software Requirement
Before you can use your personal computers, it is necessary to ensure that all necessary programs and compilers are installed and that their functionality and compatibility have been confirmed through testing.
2.1. Compiler
Before anything else, it is crucial to have gfortran, gcc, and cpp compilers on your system. To check if they are present, enter the following command:
which gfortran cpp gcc g++If they are installed, you will receive information about the location of each compiler.
If not, you need to install it before continue the rest.
sudo apt-get install gfortran cpp gcc g++It is recommended to use a Fortran compiler that complies with the Fortran 2003 standard (version 4.6 or higher). To determine the version of gfortran installed, enter the following command:
gcc --versionBesides the compilers needed to create the WRF executables, the WRF build process uses scripts as the primary interface for users. For the WRF scripting system to function properly, it is essential to have the following installed: csh, perl and sh.
To check if they are present, enter the following command:
which csh perlFor sh, it’s usually part of the default shell and should already be available. If it’s somehow missing or you encounter problems, it might be indicative of a larger issue with your shell environment.
If they are installed, you will receive information about the location of each compiler.
If not, you need to install it before continue the rest.
sudo apt-get install csh perl -yThis command will install both csh and perl at the same time, making the process more efficient. The -y flag automatically answers “yes” to any prompts during the installation process, ensuring that the installation proceeds without requiring interactive input.
2.2. Compiler Test
There are some straightforward tests that can be performed to ensure that the Fortran compiler has been properly constructed and is compatible with the C compiler.
Navigate to
TESTSdirectorycd TESTSDownload and extract the test file.
wget https://www2.mmm.ucar.edu/wrf/OnLineTutorial/compile_tutorial/tar_files/Fortran_C_tests.tar
tar -xf Fortran_C_tests.tar
Download file
fortran-c-test.shand put insideTESTSdirectory, and execute it.sh fortran-c-test.shThere should be seven tests that should all display a SUCCESS message. If so, then everything is in good shape and you can proceed to building the required libraries.
Or you can try to execute the test one-by-one:
Test #1: Fixed Format Fortran Test
gfortran TEST_1_fortran_only_fixed.f
./a.out
Test #2: Free Format Fortran
gfortran TEST_2_fortran_only_free.f90
./a.out
Test #3: C: TEST_3_c_only.c
gcc TEST_3_c_only.c
./a.out
Test #4: Fortran Calling a C Function
gcc -c -m64 TEST_4_fortran+c_c.c
gfortran -c -m64 TEST_4_fortran+c_f.f90
gfortran -m64 TEST_4_fortran+c_f.o TEST_4_fortran+c_c.o
./a.out
Test #5: csh
./TEST_csh.cshTest #6: perl
./TEST_perl.plTest #7: sh
./TEST_sh.shThe following should print out to the screen for each test:
Test1:
SUCCESS test 1 fortran only fixed formatTest2:
Assume Fortran 2003: has FLUSH, ALLOCATABLE, derived type, and ISO C Binding
SUCCESS test 2 fortran only free format
Test3:
SUCCESS test 3 c onlyTest4:
C function called by Fortran
Values are xx = 2.00 and ii = 1
SUCCESS test 4 fortran calling c
Test5:
SUCCESS csh testTest6:
SUCCESS perl testTest7:
SUCCESS sh testAfter passing the test, back to the working directory.
cd ..
2.3. Other packages
We need to install json-c and valgrind which will required during MPICH test. Here’s how you can install the latest available versions of JSON-C - https://json-c.github.io/json-c/json-c-current-release/doc/html/index.html and Valgrind - https://valgrind.org/ in WSL2 Debian 12:
Update your package list:
sudo apt-get updateInstall JSON-C:
You can install the latest version available in the Debian repository using:
sudo apt-get install libjson-c-devInstall Valgrind:
Install Valgrind using:
sudo apt-get install valgrind
2.4. Conda
OPTIONAL Conda will use later after successfully run the WRF model and would like to utilizing the WRF output. If you just need to install the WRF, you can skip Conda installation.
Skip this step if you already have Anaconda or Miniconda inside your WSL. This case I will use Anaconda instead of Miniconda.
Go to https://repo.anaconda.com/archive/ to find the list of Anaconda releases
Select the release you want. I have a 64-bit computer, so I chose the latest release ending in
x86_64.sh. If I had a 32-bit computer, I’d select thex86.shversion. If you accidentally try to install the wrong one, you’ll get a warning in the terminal. I choseAnaconda3-2023.09-0-Linux-x86_64.sh.From the terminal run
wget https://repo.anaconda.com/archive/[YOUR VERSION]. Example:wget https://repo.anaconda.com/archive/Anaconda3-2023.09-0-Linux-x86_64.shAfter download process completed, Run the installation script:
bash Anaconda[YOUR VERSION].shbash Anaconda3-2023.09-0-Linux-x86_64.shRead the license agreement and follow the prompts to press Return/Enter to accept. Later will follow with question on accept the license terms, type
yesand Enter. When asks you if you’d like the installer to prepend it to the path, press Return/Enter to confirm the location. Last question will be about initialize Anaconda3, typeyesthen Enter.Close the terminal and reopen it to reload .bash configs. It will automatically activate
baseenvironment.Deactivate
baseenvironment then set tofalsethe confirguration of auto activate thebaseenvironment by typingconda deactivate && conda config --set auto_activate_base falseTo test that it worked,
which pythonin your Terminal. It should print a path that has anaconda in it. Mine is/home/bennyistanto/anaconda3/bin/python. If it doesn’t have anaconda in the path, do the next step.Manually add the Anaconda bin folder to your PATH. To do this, I added
"export PATH=/home/bennyistanto/anaconda3/bin:$PATH"to the bottom of my~/.zshrcfile.
3. Building Libraries
Before getting started, it is necessary to create another directory. First, navigate to the Build_WRF directory by entering the following command:
cd Build_WRFThen, create a directory called LIBRARIES using the following command:
mkdir LIBRARIES
cd LIBRARIES
The required libraries for your desired run may vary. But the essential libraries are below.
- MPICH, this library is required if you plan to run WRF in parallel mode on a machine with multiple processors. If your machine only has one processor or if you don’t need to run WRF with multiple processors, you can skip the MPICH installation. Although any implementation of the MPI-2 standard should work with WRF, we have the most experience with MPICH, so that is the implementation that will be described. https://www.mpich.org/
- zlib, is a general-purpose, lossless data-compression library that is used by many software programs. Installing it first after the MPI compiler ensures that any other libraries or applications requiring compression capabilities can utilize it. https://www.zlib.net/
- libpng, is the official PNG reference library. It’s used for handling PNG images, potentially useful in visualizing data outputs from simulations if your configuration of WRF includes such capabilities. http://www.libpng.org/pub/png/libpng.html
- Jasper, is a software library for image coding and compression using the JPEG 2000 standard. It’s important for WRF if our data inputs or outputs include JPEG 2000 formats, which might be used in data assimilation or visualization. https://www.ece.uvic.ca/~frodo/jasper/
- HDF5, this library required by NetCDF, is used for storing complex data arrays and is extensively used in scientific computing. HDF5 can utilize MPI for managing data in a parallel computing environment, which is why it’s beneficial to install MPICH before HDF5. https://www.hdfgroup.org/solutions/hdf5/
- NetCDF, it consist of
netcdf-chttps://github.com/Unidata/netcdf-c/releases/tag/v4.8.1 andnetcdf-fortranhttps://github.com/Unidata/netcdf-fortran/releases/tag/v4.5.4, both library is always necessary and essential for WRF as it is used for the creation, access, and sharing of array-oriented scientific data. This format is central to WRF data input and output. Installing NetCDF-C before NetCDF-Fortran is necessary because the Fortran interface depends on the C library.
Next we need to start downloading the libraries
Download file
library-download.sh, and execute it.sh library-download.shOr you can download it one-by-one using below:
wget https://github.com/pmodels/mpich/releases/download/v3.4.3/mpich-3.4.3.tar.gz
wget https://www2.mmm.ucar.edu/wrf/OnLineTutorial/compile_tutorial/tar_files/zlib-1.2.11.tar.gz
wget https://www2.mmm.ucar.edu/wrf/OnLineTutorial/compile_tutorial/tar_files/libpng-1.2.50.tar.gz
wget https://www2.mmm.ucar.edu/wrf/OnLineTutorial/compile_tutorial/tar_files/jasper-1.900.1.tar.gz
wget https://docs.hdfgroup.org/archive/support/ftp/HDF5/releases/hdf5-1.12/hdf5-1.12.0/src/hdf5-1.12.0.tar.gz
wget https://github.com/Unidata/netcdf-c/archive/refs/tags/v4.8.1.tar.gz -O netcdf-c-4.8.1.tar.gz
wget https://github.com/Unidata/netcdf-fortran/archive/refs/tags/v4.5.4.tar.gz -O netcdf-fortran-4.5.4.tar.gz
Inside the folder you will find seven libraries:
mpich,zlib,libpng,jasper,hdf5,netcdf-candnetcdf-fortran.For WRF, especially if you’re planning to use parallel processing capabilities, it is essential that libraries which directly support parallel I/O operations (like HDF5, NetCDF-C, and NetCDF-Fortran) are compiled with a parallel-aware compiler such as MPICH. Here’s a detailed breakdown:
Library Installation Order and Compiler Choices:
- MPICH: This should definitely be installed first, as it provides the necessary MPI libraries and compilers (like mpicc and mpif90) that are needed for parallel computing support in other libraries.
- Zlib: This library is used for compression and is a dependency for HDF5 and NetCDF. Zlib does not directly benefit from parallelization, so you can compile it with GCC or any standard C compiler.
- Libpng: This is used for handling PNG files and is also a dependency for Jasper. Like Zlib, it does not require parallelization capabilities, so a standard compiler can be used here.
- Jasper: Jasper is a library for handling JPEG2000 files, often used in conjunction with weather data formats. It also does not require MPI for its functionalities, so a standard C compiler is sufficient.
- HDF5: This is critical to compile with MPICH if you want to enable parallel I/O capabilities, which are essential for handling large datasets efficiently in a parallel computing environment like WRF.
- NetCDF-C: Since NetCDF builds on top of HDF5 for data access, it should also be compiled with MPICH to support parallel operations, especially for large data sets used in high-resolution models.
- NetCDF-Fortran: This provides a Fortran interface to the NetCDF-C libraries and should be compiled with MPICH for consistency and to enable parallel data handling in Fortran-based applications like WRF.
Before installing the libraries, some paths must be set:
Download file
set-env.sh, and execute it.sh set-env.shTo make sure all paths are correctly set, check file
.zshrcin user’s home directory usingnano.nano ~/.zshrcMake sure all text written in script
set-env.shis there, usually at the bottom. If the list is there, you can close thenanowindow by pressingctrl+X.If the above-mentioned path list is not there, you can manually add it. Don’t forget to adjust the user’s home directory folder with yours.
# WRF Configuration Setting
# Compilers
export CC=/usr/bin/gcc
export CXX=/usr/bin/g++
export FC=/usr/bin/gfortran
export FCFLAGS="-m64"
export F77=/usr/bin/gfortran
export FFLAGS="-m64"
# Directory
export DIR=/home/bennyistanto/Build_WRF/LIBRARIES
export WRF_DIR=/home/bennyistanto/Build_WRF/WRF
export MPICH=$DIR/mpich
export NETCDF=$DIR/netcdf
export JASPERLIB=$DIR/grib2/lib
export JASPERINC=$DIR/grib2/include
export PATH=$DIR/grib2/bin:$MPICH/bin:$NETCDF/bin:$PATH
# Libraries
export LD_LIBRARY_PATH=$DIR/grib2/lib:$LD_LIBRARY_PATH
export LDFLAGS="-L$DIR/grib2/lib"
export CPPFLAGS="-I$DIR/grib2/include"
When you are done making your changes, press
ctrl+Oand hitENTERto save the changes. Closenanoby pressctrl+XNotes:
Above WRF environment setting, especially after “# Libraries” are works formpich,zlib,libpng,jasper,hdf5,netcdf-c. Then you will modify those part before installing thenetcdf-fortran. If you would like to re-install one of the first 6 libraries, don’t forget to change back the environment setting, especially after “# Libraries” to the original setting.To see whats available configuration on each libraries, we can enter into each libraries folder, and execute below script:
Example to check the configuration setting that available in
mpichtar xzvf mpich-3.4.3.tar.gz cd mpich-3.4.3 ./configure --helpThe choice of configuration on each libraries are very subjective, we can explore it, try-and-error, implement depend on our need.
It is important to ensure that these libraries are installed using the same compilers that will be used for the WRF and WPS installations.
Download file
library-build.sh, and execute it.sh library-build.shOr we can install the library one-by-one using the following order, so it will much easier to track if there is an error on each package:
mpich, details on installation and configuration are available at https://github.com/pmodels/mpich# Untar the mpich library tar xzvf mpich-3.4.3.tar.gz # Entering the directory cd mpich-3.4.3 # Configuration and install export FFLAGS=-fallow-argument-mismatch ./configure --prefix=$DIR/mpich --with-device=ch3:nemesis --enable-fast=all,O3 --disable-float --enable-threads=multiple make check make install # Set mpich path export PATH=$DIR/mpich/bin:$PATH # Back to LIBRARIES folder cd ..Build
zliblike below, details on installation and configuration are available at https://www.zlib.net/zlib_faq.html#faq14# Untar the zlib library tar xzvf zlib-1.2.11.tar.gz # Entering the directory cd zlib-1.2.11 # Configuration and install ./configure --prefix=$DIR/grib2 make check make install # Back to LIBRARIES folder cd ..libpng, details on installation and configuration are available at https://github.com/pnggroup/libpng/blob/libpng16/INSTALL# Untar the libpng library tar xzvf libpng-1.2.50.tar.gz # Entering the directory cd libpng-1.2.50 # Configuration and install ./configure --prefix=$DIR/grib2 make check make install # Back to LIBRARIES folder cd ..jasper, details on installation and configuration are available at https://github.com/jasper-software/jasper/blob/master/INSTALL.txt# Untar the jasper library tar xzvf jasper-1.900.1.tar.gz # Entering the directory cd jasper-1.900.1 # Configuration and install ./configure --prefix=$DIR/grib2 make check make install # Back to LIBRARIES folder cd ..Then you build
hdf5, specifying the location of the zlib library. Details on compiling steps are available at [here] (https://docs.hdfgroup.org/hdf5/develop/_l_b_compiling.html)# Untar the hdf5 library tar xzvf hdf5-1.12.0.tar.gz # Entering the directory cd hdf5-1.12.0 # Configuration and install ./configure --prefix=$DIR/grib2 --with-zlib=$DIR/grib2 --enable-hl --enable-fortran make check make install # Back to LIBRARIES folder cd ..Make sure you run
make checkafter the configure process. If you get FAIL, then you can adjust theconfigurescript by add/remove/modify the Optional Features. Check the option list using./configure --help.They are very well-behaved distributions, but sometimes the build doesn’t work (perhaps because of something subtly misconfigured on the target machine). If one of these libraries is not working, netCDF will have serious problems.
For parallel I/O: The configure script sets CFLAGS appropriately for standard compilers, but if you are building with parallel I/O using wrappers such as
mpicc,mpif90, andmpif77, specify compilers using the CC, FC, and F77 variables before configure.You can change the configuration line above with below line.
CC=mpicc FC=mpif90 F77=mpif77 CXX=mpicxx ./configure --prefix=$DIR/grib2 --with-zlib=$DIR/grib2 --enable-hl --enable-fortran --enable-parallelNotes:
Compiler Environment Variables: SpecifyingCC=mpicc FC=mpif90 F77=mpif77is correct for setting the C, Fortran 90, and Fortran 77 compilers to the MPICH wrappers. This will ensure that HDF5 is compiled with MPI support.--prefix=$DIR/grib2: This setting is supposed to define where HDF5 will be installed. Ensure that$DIRis correctly defined in your environment and that/grib2is the intended directory for HDF5. If you’re installing HDF5 and not specifically related to GRIB2 data handling, consider a more descriptive directory, like$DIR/hdf5.--with-zlib=$DIR/grib2: This specifies where the configure script should look for the zlib library.Flags:
--enable-hl: This enables the high-level API, which is generally recommended.--enable-fortran: Necessary if you plan to use HDF5 from Fortran applications.--enable-parallel: This is crucial for enabling parallel I/O capabilities in HDF5 using MPI.
Other option also available, please check using
./configure --helpnetcdf-c, details on installation and configuration are available at https://github.com/Unidata/netcdf-c/blob/main/INSTALL.md# Untar the netcdf library tar xzvf netcdf-c-4.8.1.tar.gz # Entering the directory cd netcdf-c-4.8.1 # Configuration and install CPPFLAGS=-I$DIR/grib2/include LDFLAGS=-L$DIR/grib2/lib ./configure --prefix=$DIR/netcdf --with-hdf5=$DIR/grib2 --disable-dap --enable-netcdf-4 --enable-netcdf4 --enable-shared --enable-static --enable-large-file-tests --enable-parallel-tests --enable-hdf5 --enable-nczarr make check make install # Registering library libtool --finish $DIR/netcdf/lib # Back to LIBRARIES folder cd ..For parallel I/O: The configure script sets CFLAGS appropriately for standard compilers, but if you are building with parallel I/O using wrappers such as
mpicc,mpif90, andmpif77, specify compilers using the CC, FC, and F77 variables before configure.You can change the configuration line above with below line.
CC=mpicc FC=mpif90 F77=mpif77 CXX=mpicxx CPPFLAGS=-I$DIR/grib2/include LDFLAGS=-L$DIR/grib2/lib ./configure --prefix=$DIR/netcdf --with-hdf5=$DIR/grib2 --disable-dap --enable-netcdf-4 --enable-netcdf4 --enable-shared --enable-static --enable-large-file-tests --enable-parallel-tests --enable-hdf5 --enable-nczarrBefore continuing with
netcdf-fortraninstallation, you need to update the.zshrc, so theCPPFLAGS,LDFLAGSandLD_LIBRARY_PATHare recognized thenetcdf-clibrary that has been installed in previous step. Download fileupdate_zshrc.shand put insideLIBRARIESdirectory, and execute it.sh update_zshrc.shDetails on above script is below.
#!/bin/bash # Path to your .zshrc file ZSHRC="$HOME/.zshrc" # Backup original .zshrc file before making changes cp "$ZSHRC" "$ZSHRC.backup" # Update environment variables for netcdf-fortran installation sed -i 's|export CPPFLAGS="-I$DIR/grib2/include"|export CPPFLAGS="-I$DIR/netcdf/include -I$DIR/grib2/include"|' "$ZSHRC" sed -i 's|export LDFLAGS="-L$DIR/grib2/lib"|export LDFLAGS="-L$DIR/netcdf/lib -L$DIR/grib2/lib"|' "$ZSHRC" sed -i 's|export LD_LIBRARY_PATH=$DIR/grib2/lib:$LD_LIBRARY_PATH|export LD_LIBRARY_PATH=$DIR/netcdf/lib:$DIR/grib2/lib:$LD_LIBRARY_PATH|' "$ZSHRC" # Add LIBS="-lnetcdf -lz -lhdf5_hl -lhdf5 -lm" if not already present if ! grep -q 'export LIBS="-lnetcdf -lz -lhdf5_hl -lhdf5 -lm"' "$ZSHRC"; then echo 'export LIBS="-lnetcdf -lz -lhdf5_hl -lhdf5 -lm"' >> "$ZSHRC" fi echo "Updated .zshrc for netcdf-fortran installation. Original .zshrc backed up to $ZSHRC.backup"Or you can manually update the
.zshrcfile. Replace lines below.# Libraries export LD_LIBRARY_PATH=$DIR/grib2/lib:$LD_LIBRARY_PATH export LDFLAGS="-L$DIR/grib2/lib" export CPPFLAGS="-I$DIR/grib2/include"With below lines.
# Libraries export CPPFLAGS="-I$DIR/netcdf/include -I$DIR/grib2/include" export LDFLAGS="-L$DIR/netcdf/lib -L$DIR/grib2/lib" export LD_LIBRARY_PATH=$DIR/netcdf/lib:$DIR/grib2/lib:$LD_LIBRARY_PATH export LIBS="-lnetcdf -lz -lhdf5_hl -lhdf5 -lm"netcdf-fortran# Untar the netcdf-fortran library tar xzvf netcdf-fortran-4.5.4.tar.gz # Entering the directory cd netcdf-fortran-4.5.4 # Configuration and install CPPFLAGS="-I$DIR/netcdf/include -I$DIR/grib2/include" LDFLAGS="-L$DIR/netcdf/lib -L$DIR/grib2/lib" ./configure --prefix=$DIR/netcdf --enable-shared --enable-static --enable-large-file-tests --disable-fortran-type-check make check make install # Back to LIBRARIES folder cd ..If in previous
netcdf-cinstallation, you are usingmpichcompiler to enable parallelization, then you need to do the same for thenetcdf-fortran. You can change the configuration line above with below line.CC=mpicc FC=mpif90 F77=mpif77 CXX=mpicxx CPPFLAGS="-I$DIR/netcdf/include -I$DIR/grib2/include" LDFLAGS="-L$DIR/netcdf/lib -L$DIR/grib2/lib" ./configure --prefix=$DIR/netcdf --enable-shared --enable-static --enable-large-file-tests --disable-fortran-type-check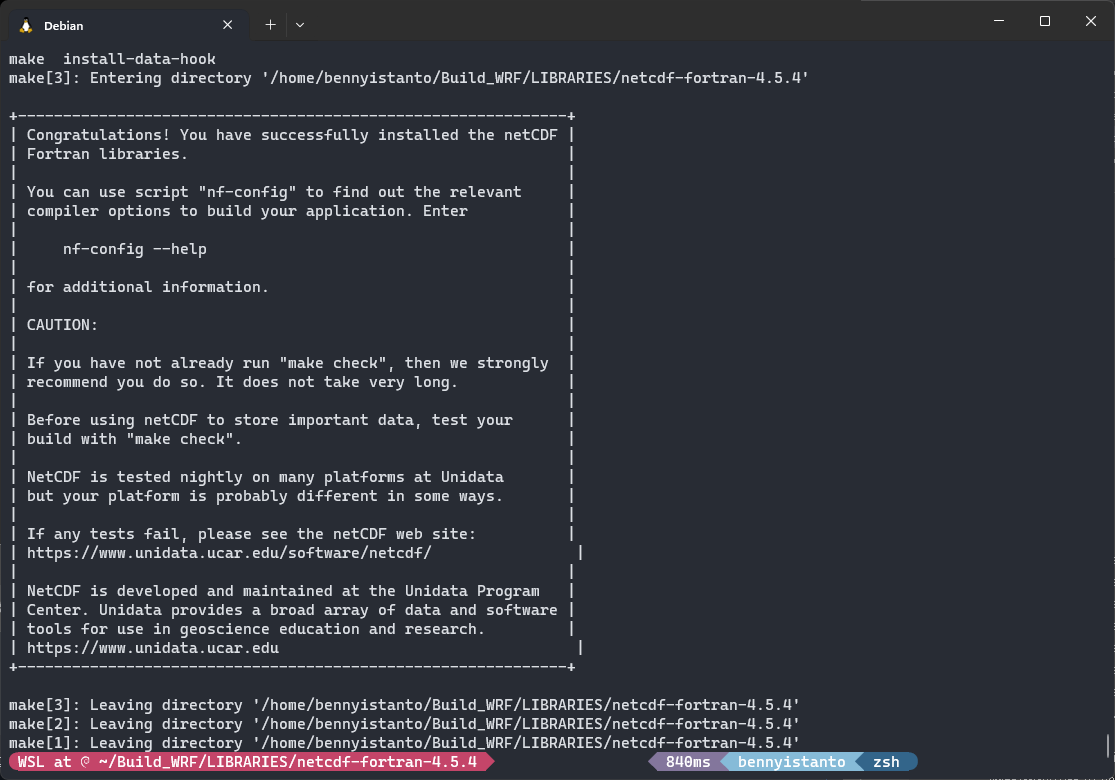
NetCDF Fortran successfully installed
In all cases, the installation location specified with the
--prefixoption must be different from the source directory where the software is being built.Note that for shared libraries, you may need to add the install directory to the
LD_LIBRARY_PATHenvironment variable.
4. Library Compatibility Test
After the system environment tests have confirmed that the target machine can build small Fortran and C executables and the NetCDF and MPI libraries have been constructed (as described in the Building Libraries section), two additional tests are necessary to mimic the behavior of the WRF code. These tests are needed to confirm that the libraries are compatible with the compilers that will be used for the WPS and WRF builds.
Navigate to
TESTSdirectorycd ~/TESTSDownload and extract the test file.
wget https://www2.mmm.ucar.edu/wrf/OnLineTutorial/compile_tutorial/tar_files/Fortran_C_NETCDF_MPI_tests.tar tar -xf Fortran_C_NETCDF_MPI_tests.tarDownload file
fortran-lib-test.shand put insideTESTSdirectory, and execute it.sh fortran-lib-test.shThere should be two tests that should all display a SUCCESS message. If so, then everything is in good shape and you can proceed to building the WRF.
The following should print out to the screen for each test:
Test1:
C function called by Fortran Values are xx = 2.00 and ii = 1 SUCCESS test 1 fortran + c + netcdfTest2:
C function called by Fortran Values are xx = 2.00 and ii = 1 status = 2 SUCCESS test 2 fortran + c + netcdf + mpiAfter passing the test, back to the working directory.
cd ~/Build_WRF
5. Building WRF
Once you have confirmed that all libraries are compatible with the compilers, you can proceed to build WRF. The source code for WRF can be obtained from the WRF’s Github repo.
To obtain the source code, execute below code:
git clone https://github.com/wrf-model/WRFInside folder
Build_WRF, you will have a folderWRFwhich contain the source code.Once you obtain the WRF source code, go into the WRF directory:
cd WRFCreate a configuration file for your computer and compiler:
./configureYou will encounter different options. Select the option that corresponds to the compiler you are using and the desired method of building WRF (e.g. serial or parallel). There are 3 parallel options (smpar, dmpar, and dm+sm), but dmpar is the most commonly used and recommended choice.
What are the differences between Serial, SMPar, and DMPar compiles of WRF?
Serial is used for a single CPU, SMPar is for multi-core/multi CPUs, and DMPar is for clusters.
SMPar means “Shared-memory Parallelism.” In practice the OpenMP directives are enabled and the resulting binary will only run within a single shared-memory system. This option is not highly tested, however, and is usually not recommended if the option for DMPar is available.
DMPar means “Distributed-memory Parallelism,” which means MPI will be used in the build. The resulting binary will run within and across multiple nodes of a distributed-memory system (or cluster).
------------------------------------------------------------------------ Please select from among the following Linux x86_64 options: 1. (serial) 2. (smpar) 3. (dmpar) 4. (dm+sm) PGI (pgf90/gcc) 5. (serial) 6. (smpar) 7. (dmpar) 8. (dm+sm) PGI (pgf90/pgcc): SGI MPT 9. (serial) 10. (smpar) 11. (dmpar) 12. (dm+sm) PGI (pgf90/gcc): PGI accelerator 13. (serial) 14. (smpar) 15. (dmpar) 16. (dm+sm) INTEL (ifort/icc) 17. (dm+sm) INTEL (ifort/icc): Xeon Phi (MIC architecture) 18. (serial) 19. (smpar) 20. (dmpar) 21. (dm+sm) INTEL (ifort/icc): Xeon (SNB with AVX mods) 22. (serial) 23. (smpar) 24. (dmpar) 25. (dm+sm) INTEL (ifort/icc): SGI MPT 26. (serial) 27. (smpar) 28. (dmpar) 29. (dm+sm) INTEL (ifort/icc): IBM POE 30. (serial) 31. (dmpar) PATHSCALE (pathf90/pathcc) 32. (serial) 33. (smpar) 34. (dmpar) 35. (dm+sm) GNU (gfortran/gcc) 36. (serial) 37. (smpar) 38. (dmpar) 39. (dm+sm) IBM (xlf90_r/cc_r) 40. (serial) 41. (smpar) 42. (dmpar) 43. (dm+sm) PGI (ftn/gcc): Cray XC CLE 44. (serial) 45. (smpar) 46. (dmpar) 47. (dm+sm) CRAY CCE (ftn $(NOOMP)/cc): Cray XE and XC 48. (serial) 49. (smpar) 50. (dmpar) 51. (dm+sm) INTEL (ftn/icc): Cray XC 52. (serial) 53. (smpar) 54. (dmpar) 55. (dm+sm) PGI (pgf90/pgcc) 56. (serial) 57. (smpar) 58. (dmpar) 59. (dm+sm) PGI (pgf90/gcc): -f90=pgf90 60. (serial) 61. (smpar) 62. (dmpar) 63. (dm+sm) PGI (pgf90/pgcc): -f90=pgf90 64. (serial) 65. (smpar) 66. (dmpar) 67. (dm+sm) INTEL (ifort/icc): HSW/BDW 68. (serial) 69. (smpar) 70. (dmpar) 71. (dm+sm) INTEL (ifort/icc): KNL MIC 72. (serial) 73. (smpar) 74. (dmpar) 75. (dm+sm) AMD (flang/clang) : AMD ZEN1/ ZEN2/ ZEN3 Architectures 76. (serial) 77. (smpar) 78. (dmpar) 79. (dm+sm) INTEL (ifx/icx) : oneAPI LLVM 80. (serial) 81. (smpar) 82. (dmpar) 83. (dm+sm) FUJITSU (frtpx/fccpx): FX10/FX100 SPARC64 IXfx/Xlfx Enter selection [1-83] :Type
34then pressENTERThen choose nesting options
(0=no nesting, 1=basic, 2=preset moves, 3=vortex following) [default 0]:1If everything going well, you will found below message
Configuration successful! ------------------------------------------------------------------------ testing for fseeko and fseeko64 fseeko64 is supported ------------------------------------------------------------------------ # Settings for Linux x86_64 ppc64le, gfortran compiler with gcc (dmpar) # ... ... ###################### ------------------------------------------------------------------------ Settings listed above are written to configure.wrf. If you wish to change settings, please edit that file. If you wish to change the default options, edit the file: arch/configure.defaults NetCDF users note: This installation of NetCDF supports large file support. To DISABLE large file support in NetCDF, set the environment variable WRFIO_NCD_NO_LARGE_FILE_SUPPORT to 1 and run configure again. Set to any other value to avoid this message. Testing for NetCDF, C and Fortran compiler This installation of NetCDF is 64-bit C compiler is 64-bit Fortran compiler is 64-bit It will build in 64-bit NetCDF version: 4.8.1 Enabled NetCDF-4/HDF-5: yes NetCDF built with PnetCDF: no ************************** W A R N I N G ************************************ The moving nest option is not available due to missing rpc/types.h file. Copy landread.c.dist to landread.c in share directory to bypass compile error. ***************************************************************************** ***************************************************************************** This build of WRF will use NETCDF4 with HDF5 compression *****************************************************************************After finishing your configuration, you should have a
configure.wrffile and be prepared to compile WRF. You must choose which type of case you want to compile from the following options:em_real (3d real case) em_quarter_ss (3d ideal case) em_b_wave (3d ideal case) em_les (3d ideal case) em_heldsuarez (3d ideal case) em_tropical_cyclone (3d ideal case) em_hill2d_x (2d ideal case) em_squall2d_x (2d ideal case) em_squall2d_y (2d ideal case) em_grav2d_x (2d ideal case) em_seabreeze2d_x (2d ideal case) em_scm_xy (1d ideal case)Run
compilefunction wherecase_nameis one of the options listed above../compile case_name >& log.compileIf you have multi processor and want to leverage it, you can mention the number of processor would like to use. Example:
./compile [-j n] case_namewherenis number of processor, default is2. See below:./compile -j 8 em_realCompilation should take about 20-30 minutes. And youwill get printed message like below
( cd test/em_real ; /bin/rm -f GENPARM.TBL ; ln -s ../../run/GENPARM.TBL . ) ( cd test/em_real ; /bin/rm -f LANDUSE.TBL ; ln -s ../../run/LANDUSE.TBL . ) ( cd test/em_real ; /bin/rm -f SOILPARM.TBL ; ln -s ../../run/SOILPARM.TBL . ) ( cd test/em_real ; /bin/rm -f URBPARM.TBL ; ln -s ../../run/URBPARM.TBL . ) ( cd test/em_real ; /bin/rm -f URBPARM_LCZ.TBL ; ln -s ../../run/URBPARM_LCZ.TBL . ) ( cd test/em_real ; /bin/rm -f VEGPARM.TBL ; ln -s ../../run/VEGPARM.TBL . ) ( cd test/em_real ; /bin/rm -f MPTABLE.TBL ; ln -s ../../run/MPTABLE.TBL . ) ( cd test/em_real ; /bin/rm -f tr49t67 ; ln -s ../../run/tr49t67 . ) ( cd test/em_real ; /bin/rm -f tr49t85 ; ln -s ../../run/tr49t85 . ) ( cd test/em_real ; /bin/rm -f tr67t85 ; ln -s ../../run/tr67t85 . ) ( cd test/em_real ; /bin/rm -f gribmap.txt ; ln -s ../../run/gribmap.txt . ) ( cd test/em_real ; /bin/rm -f grib2map.tbl ; ln -s ../../run/grib2map.tbl . ) ( cd run ; /bin/rm -f real.exe ; ln -s ../main/real.exe . ) ( cd run ; /bin/rm -f tc.exe ; ln -s ../main/tc.exe . ) ( cd run ; /bin/rm -f ndown.exe ; ln -s ../main/ndown.exe . ) ( cd run ; if test -f namelist.input ; then \ /bin/cp -f namelist.input namelist.input.backup.`date +%Y-%m-%d_%H_%M_%S` ; fi ; \ /bin/rm -f namelist.input ; cp ../test/em_real/namelist.input . ) ========================================================================== build started: Mon Apr 22 21:43:14 WIB 2024 build completed: Mon Apr 22 22:01:41 WIB 2024 ---> Executables successfully built <--- -rwxr-xr-x 1 bennyistanto bennyistanto 46327520 Apr 22 22:01 main/ndown.exe -rwxr-xr-x 1 bennyistanto bennyistanto 46470888 Apr 22 22:01 main/real.exe -rwxr-xr-x 1 bennyistanto bennyistanto 45594520 Apr 22 22:01 main/tc.exe -rwxr-xr-x 1 bennyistanto bennyistanto 54865048 Apr 22 22:00 main/wrf.exe ==========================================================================Once the compilation completes, to check whether it was successful, you need to look for executables in the
WRF/maindirectory:ls -ls main/*.exeIf you compiled a real case, you should see:
wrf.exe(model executable)real.exe(real data initialization)ndown.exe(one-way nesting)tc.exe(for tc bogusing–serial only)
These executables are linked to 2 different directories:
WRF/runWRF/test/em_real
You can choose to run WRF from either directory.
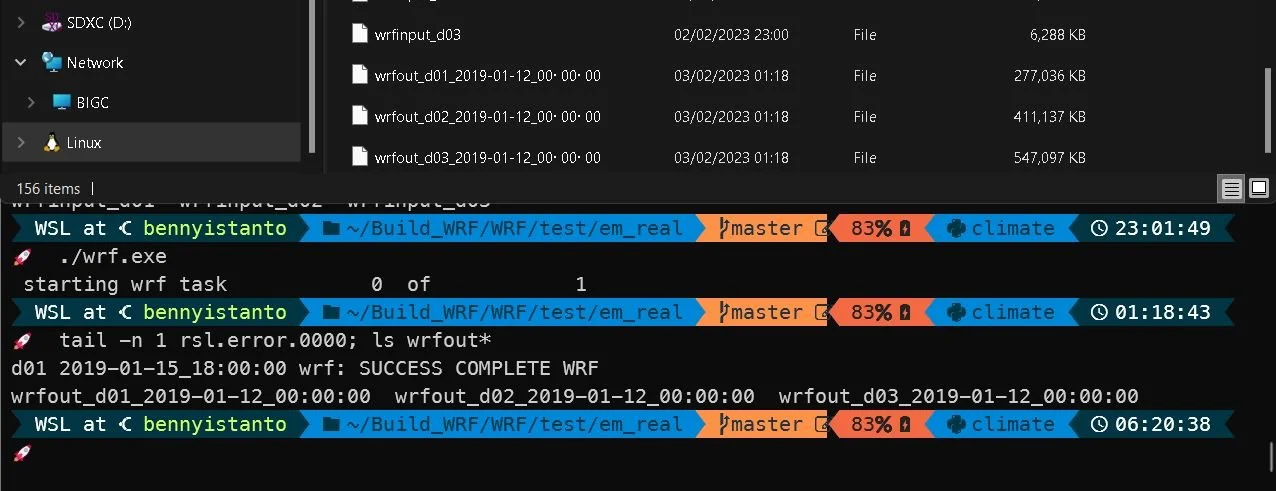
WRF successfully run
6. Building WPS
After constructing the WRF model, the next step is to build the WPS (WRF Pre-Processing System) program if you intend to run real cases instead of idealized cases. It is crucial that the WRF model is built correctly before attempting to build the WPS programs. You can acquire the WPS code by following the same process for obtaining the WRF code.
Navigate to the WRF main directory:
cd ~/Build_WRFTo obtain the source code, execute below code:
git clone https://github.com/wrf-model/WPSInside folder
Build_WRF, you will have two foldersWPSadnWRFfrom previous step.Once you obtain the WPS source code, go into the WPS directory:
cd WPSSimilar to the WRF model, make sure the WPS directory is clean, by issuing:
./cleanThe next step is to configure WPS, however, you first need to set some paths for the ungrib libraries:
export JASPERLIB=$DIR/grib2/lib export JASPERINC=$DIR/grib2/includeThe environment variable needs to be set with the path to the compiled WRF. Don’t forget to adjust the user’s home directory below.
export WRF_DIR=/home/bennyistanto/Build_WRF/WRFThen you can configure:
./configureTo build the WPS program, you will need to choose from various options including the compiler type, whether to compile in serial or parallel, and if ungrib should be compiled with GRIB2 capability. It is recommended to compile WPS in serial mode, even if WRF was compiled in parallel, unless you plan to create very large domains. Furthermore, it is advisable to select a GRIB2 option, as most data is now in that format. You can still run grib1 data even if you have built with grib2. Select the option that matches the compiler you used to compile WRF, is set to serial mode, and has GRIB2 enabled. Please note that the option number may differ from the one you chose for WRF.
------------------------------------------------------------------------ Please select from among the following supported platforms. 1. Linux x86_64, gfortran (serial) 2. Linux x86_64, gfortran (serial_NO_GRIB2) 3. Linux x86_64, gfortran (dmpar) 4. Linux x86_64, gfortran (dmpar_NO_GRIB2) 5. Linux x86_64, PGI compiler (serial) 6. Linux x86_64, PGI compiler (serial_NO_GRIB2) 7. Linux x86_64, PGI compiler (dmpar) 8. Linux x86_64, PGI compiler (dmpar_NO_GRIB2) 9. Linux x86_64, PGI compiler, SGI MPT (serial) 10. Linux x86_64, PGI compiler, SGI MPT (serial_NO_GRIB2) 11. Linux x86_64, PGI compiler, SGI MPT (dmpar) 12. Linux x86_64, PGI compiler, SGI MPT (dmpar_NO_GRIB2) 13. Linux x86_64, IA64 and Opteron (serial) 14. Linux x86_64, IA64 and Opteron (serial_NO_GRIB2) 15. Linux x86_64, IA64 and Opteron (dmpar) 16. Linux x86_64, IA64 and Opteron (dmpar_NO_GRIB2) 17. Linux x86_64, Intel compiler (serial) 18. Linux x86_64, Intel compiler (serial_NO_GRIB2) 19. Linux x86_64, Intel compiler (dmpar) 20. Linux x86_64, Intel compiler (dmpar_NO_GRIB2) 21. Linux x86_64, Intel compiler, SGI MPT (serial) 22. Linux x86_64, Intel compiler, SGI MPT (serial_NO_GRIB2) 23. Linux x86_64, Intel compiler, SGI MPT (dmpar) 24. Linux x86_64, Intel compiler, SGI MPT (dmpar_NO_GRIB2) 25. Linux x86_64, Intel compiler, IBM POE (serial) 26. Linux x86_64, Intel compiler, IBM POE (serial_NO_GRIB2) 27. Linux x86_64, Intel compiler, IBM POE (dmpar) 28. Linux x86_64, Intel compiler, IBM POE (dmpar_NO_GRIB2) 29. Linux x86_64 g95 compiler (serial) 30. Linux x86_64 g95 compiler (serial_NO_GRIB2) 31. Linux x86_64 g95 compiler (dmpar) 32. Linux x86_64 g95 compiler (dmpar_NO_GRIB2) 33. Cray XE/XC CLE/Linux x86_64, Cray compiler (serial) 34. Cray XE/XC CLE/Linux x86_64, Cray compiler (serial_NO_GRIB2) 35. Cray XE/XC CLE/Linux x86_64, Cray compiler (dmpar) 36. Cray XE/XC CLE/Linux x86_64, Cray compiler (dmpar_NO_GRIB2) 37. Cray XC CLE/Linux x86_64, Intel compiler (serial) 38. Cray XC CLE/Linux x86_64, Intel compiler (serial_NO_GRIB2) 39. Cray XC CLE/Linux x86_64, Intel compiler (dmpar) 40. Cray XC CLE/Linux x86_64, Intel compiler (dmpar_NO_GRIB2) Enter selection [1-40] :Type
3then pressENTERThe
metgrid.exeandgeogrid.exeprograms require the I/O libraries from the WRF model. The location of these libraries already set in previous step by addWRF_DIR = /home/bennyistanto/Build_WRF/WRFto thePATHand usually also automatically specified in theconfigure.wps.This is the default setting and will be accurate if the top-level directory for the WRF model is named
WRFand both theWPSandWRFdirectories are located at the same level. If this is not the case, you need to modify the configure file before compiling and saving the changes.You can now compile WPS:
./compile >& log.compileCompilation should only take a few minutes.
If the compilation is successful, there should be 3 executables in the WPS top-level directory, that are linked to their corresponding src/ directories:
geogrid.exe->geogrid/src/geogrid.exeungrib.exe->ungrib/src/ungrib.exemetgrid.exe->metgrid/src/metgrid.exe
Verify that they are not zero-sized (inside the
*/src/directory). To see file size, you can type (for e.g.,):ls -ls geogrid/src/geogrid.exe
7. Static Geography Data
To use WRF to create real-data simulations, the location of the domain must first be determined. This requires a data set that contains fields such as topography and land use catergories. Such datasets can be found on the WRF website at http://www2.mmm.ucar.edu/wrf/users/download/getsourceswps_geog.html.
Navigate to the main folder
Build_WRFthen download the datacd ~/Build_WRF wget https://www2.mmm.ucar.edu/wrf/src/wps_files/geog_high_res_mandatory.tar.gzWhen downloading the complete dataset, be aware that it is a large file. To prevent individual users from having to download the file multiple times, consider placing it in a central location that can be accessed by all.
After downloading, uncompress and un-tar the file to make it ready for use.
gunzip geog.tar.gz tar -xf geog.tarWhen you untar the file, it will be called “geog.” Rename the file to “WPS_GEOG.”
mv geog WPS_GEOGThe directory infomation is given to the geogrid program in the
/Build_WRF/WPS/namelist.wpsfile in the&geogridsection. Navigate to theWPSfolder and change the path directory according to user’s home directory.cd WPS nano namelist.wpsChange
geog_data_path = /home/bennyistanto/Build_WRF/WPS_GEOGWhen you are done making your changes, press
ctrl+Oand hitENTERto save the changes. Closenanoby pressctrl+XThe data expands to approximately 10 GB. This data allows a user to run the
geogrid.exeprogram.
8. Real-time Data
To run real-data cases, the WRF model requires current meteorological information for both initial and lateral boundary conditions. This data is traditionally provided as a Grib file obtained from a previously run external model or analysis. For a semi-operational set-up, the meteorological data is generally sourced from a global model, which permits locating the WRF model’s domains anywhere on the globe.
The National Centers for Environmental Prediction (NCEP) operates the Global Forecast System (GFS) model, which is available four times a day (initializations valid for 0000, 0600, 1200, and 1800 UTC). This is a global, isobaric, 0.5-degree latitude/longitude, forecast dataset that is freely available and is usually accessible four hours after the initialization time period.
To access the required data, a single file must be acquired for each requested time period. For instance, if you need hours 0, 6, and 12 of a forecast that was initialized on July 12, 2019, at 0000 UTC, you will require the following times:
2019071200 – 0 h 2019071206 – 6 h 2019071212 – 12 hThese times correspond to the following file names:
gfs.2019071200/gfs.t00z.pgrb2.0p50.f000 gfs.2019071200/gfs.t00z.pgrb2.0p50.f006 gfs.2019071200/gfs.t00z.pgrb2.0p50.f012Note that the initialization data and time (gfs.2019071200) remain the same, and the forecast cycle remains the same (t00z). The forecast hour (f00, f06, f12) is incremented.
To obtain the data, create a directory in
Build_WRFnamedDATAand then navigate to that directory.cd ~/Build_WRF mkdir DATA cd DATAA straightforward set of interactive commands to obtain these files from the NCEP servers in real-time would look like:
- The time and date presented above is just an example, as the NCEP data servers usually have only the latest 2-3 days’ data available. Therefore, if you want to use current real-time data, you must modify the commands to reflect the current date and time.
- Typically, these commands will return a complete file within a couple of minutes, and the files will be in Grib Edition 2 format, which can be directly used by the ungrib program.
- The following three commands are separate commands to download data for three distinct times. Each command includes the “wget” command and the full https address and file name.
wget https://ftp.ncep.noaa.gov/data/nccf/com/gfs/prod/gfs.20230201/00/atmos/gfs.t00z.pgrb2.0p25.f000 wget https://ftp.ncep.noaa.gov/data/nccf/com/gfs/prod/gfs.20230201/00/atmos/gfs.t00z.pgrb2.0p25.f003 wget https://ftp.ncep.noaa.gov/data/nccf/com/gfs/prod/gfs.20230201/00/atmos/gfs.t00z.pgrb2.0p25.f006
References
This step-by-step was adapted from the WRF official tutorial: https://www2.mmm.ucar.edu/wrf/OnLineTutorial/compilation_tutorial.php
Supporting Files
#!/bin/bash
# System Environment Tests
# Test1
echo "Test #1: Fixed Format Fortran Test"
gfortran TEST_1_fortran_only_fixed.f
./a.out
echo ""
# Test2
echo "Test #2: Free Format Fortran"
gfortran TEST_2_fortran_only_free.f90
./a.out
echo ""
# Test3
echo "Test #3: C: TEST_3_c_only.c"
gcc TEST_3_c_only.c
./a.out
echo ""
# Test4
echo "Test #4: Fortran Calling a C Function"
gcc -c -m64 TEST_4_fortran+c_c.c
gfortran -c -m64 TEST_4_fortran+c_f.f90
gfortran -m64 TEST_4_fortran+c_f.o TEST_4_fortran+c_c.o
./a.out
echo ""
# Test5
echo "Test #5: csh"
./TEST_csh.csh
echo ""
# Test6
echo "Test #6: perl"
./TEST_perl.pl
echo ""
# Test7
echo "Test #7: sh"
./TEST_sh.sh
echo ""#!/bin/bash
# Library Compatibility Tests
# Test1
echo "Test #1: Fortran + C + NetCDF"
echo "The NetCDF-only test requires the netcdf.inc file from the NETCDF package be in this directory. Copying the file."
cp ${NETCDF}/include/netcdf.inc .
echo "Compile the Fortran and C codes for the purpose of this test (the -c option says to not try to build an executable)."
gfortran -c 01_fortran+c+netcdf_f.f
gcc -c 01_fortran+c+netcdf_c.c
gfortran 01_fortran+c+netcdf_f.o 01_fortran+c+netcdf_c.o -L${NETCDF}/lib -lnetcdff -lnetcdf
./a.out
echo ""
# Test2
echo "Test #2: Fortran + C + NetCDF + MP"
echo "The NetCDF+MPI test requires include files from both of these packages be in this directory,"
echo "but the MPI scripts automatically make the mpif.h file available without assistance,"
echo "so no need to copy that one. Copying the NetCDF file"
cp ${NETCDF}/include/netcdf.inc .
echo "Note that the MPI executables mpif90 and mpicc are used below when compiling."
mpif90 -c 02_fortran+c+netcdf+mpi_f.f
mpicc -c 02_fortran+c+netcdf+mpi_c.c
mpif90 02_fortran+c+netcdf+mpi_f.o 02_fortran+c+netcdf+mpi_c.o -L${NETCDF}/lib -lnetcdff -lnetcdf
mpirun ./a.out
echo ""#!/bin/bash
# mpich
# Untar the mpich library
tar xzvf mpich-3.4.3.tar.gz
# Entering the directory
cd mpich-3.4.3
# Configuration and install
export FFLAGS=-fallow-argument-mismatch
./configure --prefix=$DIR/mpich --with-device=ch3:nemesis --enable-fast=all,O3 --disable-float --enable-threads=multiple
make check
make install
# Back to LIBRARIES folder
cd ..
# zlib
# Untar the zlib library
tar xzvf zlib-1.2.11.tar.gz
# Entering the directory
cd zlib-1.2.11
# Configuration and install
./configure --prefix=$DIR/grib2
make check
make install
# Back to LIBRARIES folder
cd ..
# libpng
# Untar the libpng library
tar xzvf libpng-1.2.50.tar.gz
# Entering the directory
cd libpng-1.2.50
# Configuration and install
./configure --prefix=$DIR/grib2
make check
make install
# Back to LIBRARIES folder
cd ..
# jasper
# Untar the jasper library
tar xzvf jasper-1.900.1.tar.gz
# Entering the directory
cd jasper-1.900.1
# Configuration and install
./configure --prefix=$DIR/grib2
make check
make install
# Back to LIBRARIES folder
cd ..
# hdf5
# Untar the hdf5 library
tar xzvf hdf5-1.12.0.tar.gz
# Entering the directory
cd hdf5-1.12.0
# Configuration and install
./configure --prefix=$DIR/grib2 --with-zlib=$DIR/grib2 --enable-hl --enable-fortran
#CC=mpicc FC=mpif90 F77=mpif77 CXX=mpicxx ./configure --prefix=$DIR/grib2 --with-zlib=$DIR/grib2 --enable-hl --enable-fortran --enable-parallel
make check
make install
# Back to LIBRARIES folder
cd ..
# netcdf-c
# Untar the netcdf library
tar xzvf netcdf-c-4.8.1.tar.gz
# Entering the directory
cd netcdf-c-4.8.1
# Configuration and install
CPPFLAGS=-I$DIR/grib2/include LDFLAGS=-L$DIR/grib2/lib ./configure --prefix=$DIR/netcdf --with-hdf5=$DIR/grib2 --disable-dap --enable-netcdf-4 --enable-netcdf4 --enable-shared --enable-static --enable-large-file-tests --enable-parallel-tests --enable-hdf5 --enable-nczarr
#CC=mpicc FC=mpif90 F77=mpif77 CXX=mpicxx CPPFLAGS=-I$DIR/grib2/include LDFLAGS=-L$DIR/grib2/lib ./configure --prefix=$DIR/netcdf --with-hdf5=$DIR/grib2 --disable-dap --enable-netcdf-4 --enable-netcdf4 --enable-shared --enable-static --enable-large-file-tests --enable-parallel-tests --enable-hdf5 --enable-nczarr
make check
make install
# Registering the library
libtool --finish $DIR/netcdf/lib
# Update environment variables for netcdf-fortran installation
export CPPFLAGS="-I$DIR/netcdf/include -I$DIR/grib2/include"
export LDFLAGS="-L$DIR/netcdf/lib -L$DIR/grib2/lib"
export LD_LIBRARY_PATH=$DIR/netcdf/lib:$DIR/grib2/lib:$LD_LIBRARY_PATH
# Add LIBS="-lnetcdf -lz" if not already present
export LIBS="-lnetcdf -lz -lhdf5_hl -lhdf5 -lm"
# Back to LIBRARIES folder
cd ..
# netcdf-fortran
# Untar the netcdf-fortran library
tar xzvf netcdf-fortran-4.5.4.tar.gz
# Entering the directory
cd netcdf-fortran-4.5.4
# Configuration and install
CPPFLAGS="-I$DIR/netcdf/include -I$DIR/grib2/include" LDFLAGS="-L$DIR/netcdf/lib -L$DIR/grib2/lib" ./configure --prefix=$DIR/netcdf --enable-shared --enable-static --enable-large-file-tests --disable-fortran-type-check
#CC=mpicc FC=mpif90 F77=mpif77 CXX=mpicxx CPPFLAGS="-I$DIR/netcdf/include -I$DIR/grib2/include" LDFLAGS="-L$DIR/netcdf/lib -L$DIR/grib2/lib" ./configure --prefix=$DIR/netcdf --enable-shared --enable-static --enable-large-file-tests --disable-fortran-type-check
make check
make install
# Back to LIBRARIES folder
cd ..#!/bin/bash
# Download the library
# Original source https://www2.mmm.ucar.edu/wrf/OnLineTutorial/compile_tutorial/tar_files/
#wget https://www2.mmm.ucar.edu/wrf/OnLineTutorial/compile_tutorial/tar_files/mpich-3.0.4.tar.gz
wget https://github.com/pmodels/mpich/releases/download/v3.4.3/mpich-3.4.3.tar.gz
wget https://docs.hdfgroup.org/archive/support/ftp/HDF5/releases/hdf5-1.12/hdf5-1.12.0/src/hdf5-1.12.0.tar.gz
#wget https://www2.mmm.ucar.edu/wrf/OnLineTutorial/compile_tutorial/tar_files/netcdf-c-4.7.2.tar.gz
wget https://github.com/Unidata/netcdf-c/archive/refs/tags/v4.8.1.tar.gz -O netcdf-c-4.8.1.tar.gz
#wget https://www2.mmm.ucar.edu/wrf/OnLineTutorial/compile_tutorial/tar_files/netcdf-fortran-4.5.2.tar.gz
wget https://github.com/Unidata/netcdf-fortran/archive/refs/tags/v4.5.4.tar.gz -O netcdf-fortran-4.5.4.tar.gz
wget https://www2.mmm.ucar.edu/wrf/OnLineTutorial/compile_tutorial/tar_files/jasper-1.900.1.tar.gz
wget https://www2.mmm.ucar.edu/wrf/OnLineTutorial/compile_tutorial/tar_files/libpng-1.2.50.tar.gz
wget https://www2.mmm.ucar.edu/wrf/OnLineTutorial/compile_tutorial/tar_files/zlib-1.2.11.tar.gz#!/bin/bash
# WRF Configuration Setting
# Compilers
export CC=/usr/bin/gcc
export CXX=/usr/bin/g++
export FC=/usr/bin/gfortran
export FCFLAGS="-m64"
export F77=/usr/bin/gfortran
export FFLAGS="-m64"
# Directory
export DIR=/home/bennyistanto/Build_WRF/LIBRARIES
export WRF_DIR=/home/bennyistanto/Build_WRF/WRF
export MPICH=$DIR/mpich
export NETCDF=$DIR/netcdf
export JASPERLIB=$DIR/grib2/lib
export JASPERINC=$DIR/grib2/include
export PATH=$DIR/grib2/bin:$MPICH/bin:$NETCDF/bin:$PATH
# Libraries
export LD_LIBRARY_PATH=$DIR/grib2/lib:$LD_LIBRARY_PATH
export LDFLAGS="-L$DIR/grib2/lib"
export CPPFLAGS="-I$DIR/grib2/include"#!/bin/bash
# Path to your .zshrc file
ZSHRC="$HOME/.zshrc"
# Backup original .zshrc file before making changes
cp "$ZSHRC" "$ZSHRC.backup"
# Update environment variables for netcdf-fortran installation
sed -i 's|export CPPFLAGS="-I$DIR/grib2/include"|export CPPFLAGS="-I$DIR/netcdf/include -I$DIR/grib2/include"|' "$ZSHRC"
sed -i 's|export LDFLAGS="-L$DIR/grib2/lib"|export LDFLAGS="-L$DIR/netcdf/lib -L$DIR/grib2/lib"|' "$ZSHRC"
sed -i 's|export LD_LIBRARY_PATH=$DIR/grib2/lib:$LD_LIBRARY_PATH|export LD_LIBRARY_PATH=$DIR/netcdf/lib:$DIR/grib2/lib:$LD_LIBRARY_PATH|' "$ZSHRC"
# Add LIBS="-lnetcdf -lz" if not already present
if ! grep -q 'export LIBS="-lnetcdf -lz -lhdf5_hl -lhdf5 -lm"' "$ZSHRC"; then
echo 'export LIBS="-lnetcdf -lz -lhdf5_hl -lhdf5 -lm"' >> "$ZSHRC"
fi
echo "Updated .zshrc for netcdf-fortran installation. Original .zshrc backed up to $ZSHRC.backup"